Install Eclipse with SVN
It may be tricky to install correctly the SVN plugin and connectors in Eclipse. This is an installation proposal, other options may be chosen.
→ An alternative solution: a quick Eclipse/SVN/Capsis tutorial by Gauthier Ligot [Edit fc-15.6.2022].
This was done on Linux Ubuntu 11.04 64 bits edition but it should be ok for other systems.
Note: use the last Eclipse version: e.g. Kepler (24.4.2014). Check that you select the correct SVN version, e.g. SVN 1.8 (24.4.2014).
An Eclipse SVN plugin is mandatory
Eclipse should always be used with a SVN plugin installed, even if the SVN commands are passed from another SVN client (Tortoise under Windows, SmartSVN or the terminal). Otherwise, the refactoring actions (rename, move files) would not be stored and would be forgotten when comitting (commit can be done from every SVN client), resulting in an incomfortable result (renamed or moved files considered missing and re downloaded from the server…).
1. Install Eclipse (download the last version for Java developers, Neon is a working release with Subversive available (see below))
- Download Eclipse archive, e.g. from here : https://www.eclipse.org/downloads/ (choose your system and 32 / 64 bits).
- Unzip it in a local folder, e.g. /home/coligny/Applications/.
- Run it with the given script 'eclipse'.
2. Install the SVN plugin
[EDIT fc-31.5.2023 Shortcut: a two steps installation doc for the Subversive plugin in Eclipse]
Subversive plugin standard installation procedure:
- Eclipse > Help > Install New Software > Work with: 'Indigo - https://download.eclipse.org/releases/indigo' (adapt if you installed another version of Eclipse, like Juno or Kepler).
- Expand the entry 'Collaboration'.
- Select all the entries beginning by 'Subversive' (e.g. 4 entries).
If the Subversive entries are missing
For new versions of Eclipse, the Subversive entries may not exist (example: for Eclipse 2018-12, when choosing Eclipse > Help > Install New Software > Work with: '2018-12 - https://download.eclipse.org/releases/2018-12', the 'Collaboration' entry contains no entry related to 'Subversive'). In that case:
- Click on 'Add…' button (beside 'Work with' text field).
- Fill in the 'Location' text field with the URL of the Subversive's latest stable build, for example: https://download.eclipse.org/technology/subversive/4.0/update-site/. The URL of the Subversive's latest stable build is available on this link: https://www.eclipse.org/subversive/latest-releases.php.
- Fill in the 'Name' text field (for example: Subversive 4.0).
- Click on 'Add' button to validate.
- Select all entries (they are all related to 'Subversive').
- Continue the installation process like described above.
- Finish installation.
- Restart Eclipse when proposed.
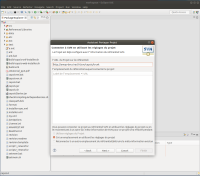
- At start time, you should be proposed the Subversive Connector Discovery.
If the Subversive Connector Discovery is not proposed
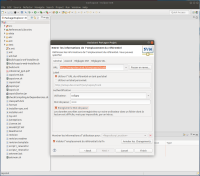
Window → Preference → Team → SVN click > SVN Client > Get Connectors.
Warning: if the SVN connectors are not installed, it might be impossible to tell Eclipse the project is under SVN version control lower.
OR see the procedure here (EDIT fc+nm-17.5.2023) :
https://www.eclipse.org/subversive/installation-instructions.php
- Choose the connector you need.
- Prefer the SVNkit (pure java, no need for additive .dll or .so files).
- Take care of the version, must be compatible with the version of your svn server (e.g. svn 1.8, SVNkit v1.8.x).
- That's it.
If the Subversive SVN Connector Discovery dialog appears at each Eclipse launching
Install the SVN kit connector manually :
- Help > Install New Software.
- In the Work with section, click on the Add… button.
- Copy the following URL in Name and Location :
https://community.polarion.com/projects/subversive/download/eclipse/6.0/update-site/
- Expand Subversive SVN Connectors.
- Select every entry not containing JavaHL (we do not want JavaHL which is harder to install…).
- Finish installation (then restart Eclipse).
3. Create your project in Eclipse
Two choices: if you don't have yet a local copy and you'd like to checkout directly with Eclipse, see section 3.1. If you already have a local copy and you want to open it in Eclipse, see section 3.2.
3.1. Checkout your project
- Eclipse > File > New > Project… > SVN > Project from SVN.
- Follow the instructions to set the location of your svn server and your Eclipse project name.
Optional: tell Eclipse this is a Java project (fc-24.4.2014).
In some cases, the upper process is not enough to make Eclipse understand that this is a Java project, to be built with Java (the project can not be built: Project > Build project is disabled).
In this case, you may try this way:
- After a SVN checkout through Eclipse or whatever SVN client (e.g. SmartSVN or the command line svn).
- With a file manager, remove the .project, .classpath and .settings files (if any) from the project directory.
- Eclipse > File > New > Java Project > set the location: the directory of the local copy you obtained with SVN checkout, finish.
- Eclipse > Select your new Java project > Team > Share project SVN > Finish.
After this procedure, your project should be recognized by Eclipse as a Java project AND a SVN project.
3.2. Add an existing local copy in Eclipse
If you already have a local copy of Capsis, you may add it as a project in Eclipse:
- Eclipse > File > New > Project… > Java > Java Project from Existing Ant File.
- Ant buildfile: select the build.xml file in capsis4/.
- Project name: capsis4 (use the name of the directory of your local copy to avoid bugs).
- Select “javac” task found in target compile.
- Check 'Link to the buildfile in the filesystem'.
Then, to tell Eclipse the project is under SVN:
- Select your new project: 'capsis4' in the Package Explorer.
- Right click > Team > Share Project…
- SVN > Next.
- Check 'Utiliser réglages du Projet' (if enable) and select the proposed line in the table mentioning 'https://amap-dev.cirad.fr/svn/capsis/trunk', or check 'Créer un emplacement en utilisant les réglages du projet'.
- Next.
- Fill in username and password (those obtained after having created an amap-dev account, see: https://capsis.cirad.fr/capsis/documentation/svn, section '2. Create an amap-dev account').
- Finish.
Check your SVN plugin
If the SVN plugin is not installed well in Eclipse, refactoring (renaming, moving in another package) a class in Eclipse will not be understood at commit time (resulting in 'missing' classes and duplicate classes coming back with the original name or location on SVN update).
To check the SVN plugin installation is Ok, try this:
- In Eclipse, open a class of your project and Refactor > Rename it (e.g. by appending a '1' to its name)
- Save the file
- Open SmartSVN and check the 'Files' panel after refreshing
- Check if SmartSVN sees the change you did under Eclipse: you should see a line with local state 'Modified' or 'Moved' for the renamed file (do not commit)
- If so, the Eclipse plugin is ok, you can Undo the name change in Eclipse and start working.
If SmartSVN does not not detect the name change, you can not use the Refactor tool in Eclipse to rename or move classes. You must first complete the svn plugin correct installation. Check particularly the SVNkit connectors installation upper.
4. Configure the project
See: https://capsis.cirad.fr/capsis/documentation/code_editor, section Eclipse > Build Capsis.


